For correct functioning, you need to setup your operating system so that it automatically receives IP addresses by DHCP.
Windows XP
Open the Start menu - "Connections" section and select the "Show all network connections" subsection.
Click on the connection corresponding to this network card with the left mouse button and select the "Properties" section.
In the list of network components, select Internet Protocol TCP / IP and click the Properties button.
In the window that appears, select the "Obtain an IP address automatically" and "Obtain DNS server address automatically" section.
Save the settings with the "OK" button, close the "Local Area Connection - Properties" window.
Windows Vista
Go to the Start menu - Control Panel - Network and Internet - Network and Sharing Center - Manage Network Connections (In the list of tasks on the left).
In the open window, right-click the Local Area Connection icon and select Properties. (The absence of the Local Area Connection icon is due to an uninstalled network card driver)
In the window "Checked components" that appears, leave all as it was in the field.
Highlight Internet Protocol Version 4 (TCP/IPv4), click the Properties button.
In the window that appears, select Obtain an IP address automatically and Obtain DNS server address automatically function.
Save the settings with the OK button, close the Local Area Connection - Properties window.
Windows 7.8
Go to the Start menu - Control Panel - Network and Internet - Network and Sharing Center - Change adapter settings (In the task list on the left).
In the open window, highlight the Local Area Connection icon, right-click, and select Properties. (The absence of the Local Area Connection icon is due to an uninstalled network card driver)
In the window that appears, in the Checked components field, leave everything as it was.
Highlight Internet Protocol Version 4 (TCP/IPv4), click the Properties button.
In the window that appears, select Obtain an IP address automatically and Obtain DNS server address automatically.
Save the settings with the OK button, close the Local Area Connection - Properties window.
You can also watch the video.
Windows 10
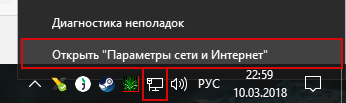
1. Right-click on the network connections icon

or

select "Open Network and Internet Settings" on the taskbar.
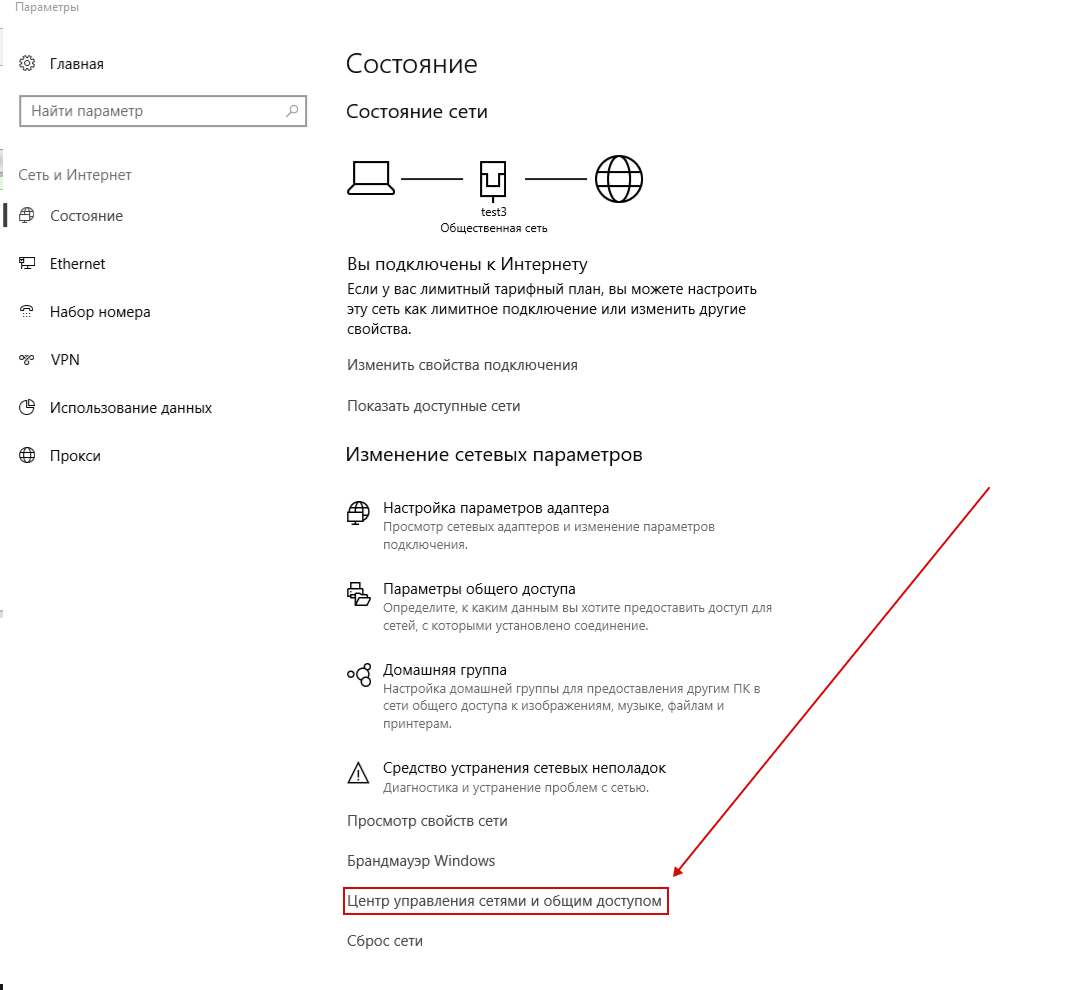
2. Next, select "Network and Sharing Center" - Change adapter settings (In the list of tasks on the left).
3. In the open window, highlight the Ethernet icon, right-click and select Properties. (The absence of the Ethernet icon is due to an uninstalled network card driver)
4. In the window that appears, in the Selected components field, everything is used by this connection as is.
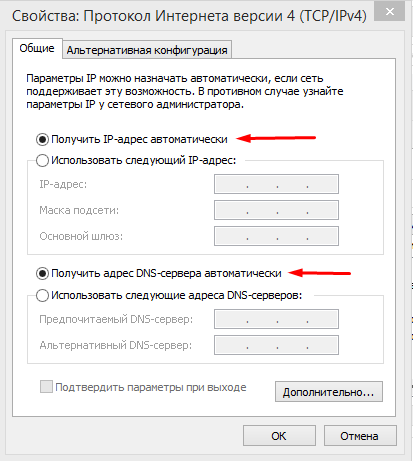
5. Highlight Internet Protocol Version 4 (TCP/IPv4), click the Properties button
6. In the window that appears, select Obtain an IP address automatically and Obtain DNS server address automatically
7. Save the settings with the OK button, close the Ethernet - Properties window.
You can also watch the video.
Subscribe to the mobile application: Viber, Telegram.
And also follow the latest news in our Telegram channel.
If you have any questions - write to us or call 777 82 82 (any mobile operator).