In this article, we will tell you how to configure the TP-Link TL-WR850N router. We have also prepared a video for you.
To configure the router:
1. You need to plug the router into a power outlet, insert the Internet cable (coming from our equipment to the apartment) into the blue port of the router, and put the patch cord into any of the yellow ports of the router and the other end into a laptop or computer. Or you can connect by a wi-fi network (if the router is reset to factory settings, then the name and password from the Wi-Fi network you can find on the bottom of the router sticker)

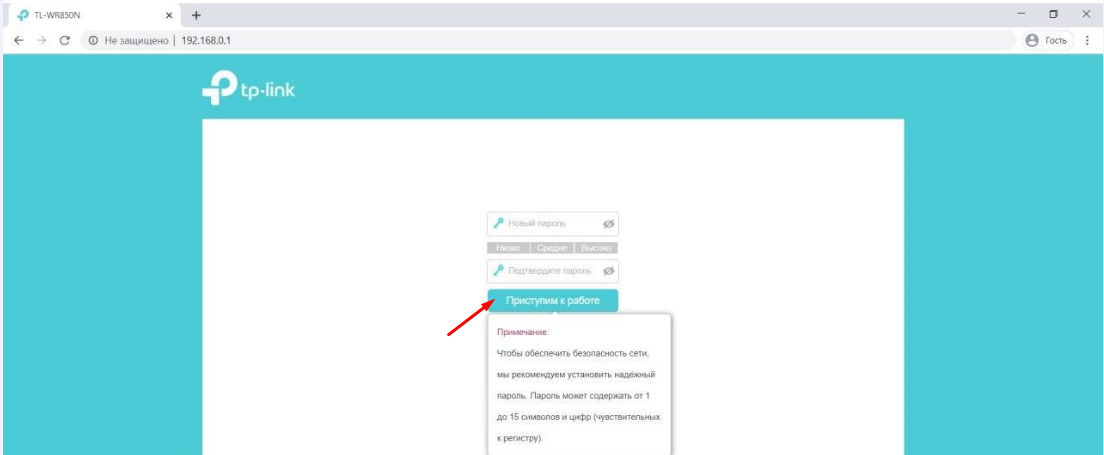
2. On a laptop/computer, open a browser, enter 192.168.0.1 in the address bar, and press the Enter button. The web interface of the router will open. You will immediately be prompted to create a password to enter the router settings. To avoid confusion, we recommend that you use the "admin" password. Enter your password twice and click the "Get Started" button
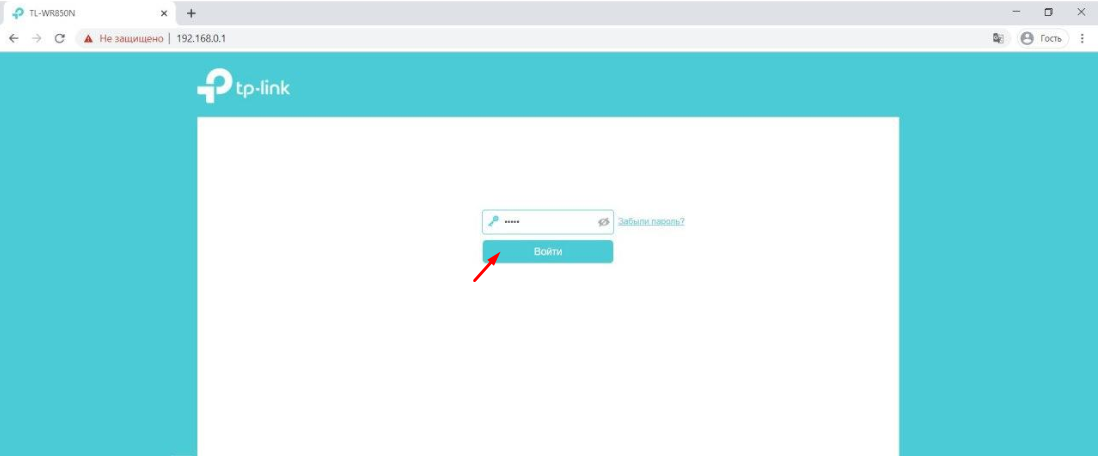
3. Now the router is asking you to enter the password you just created so you can access the settings. Enter your password and click the "Login" button.
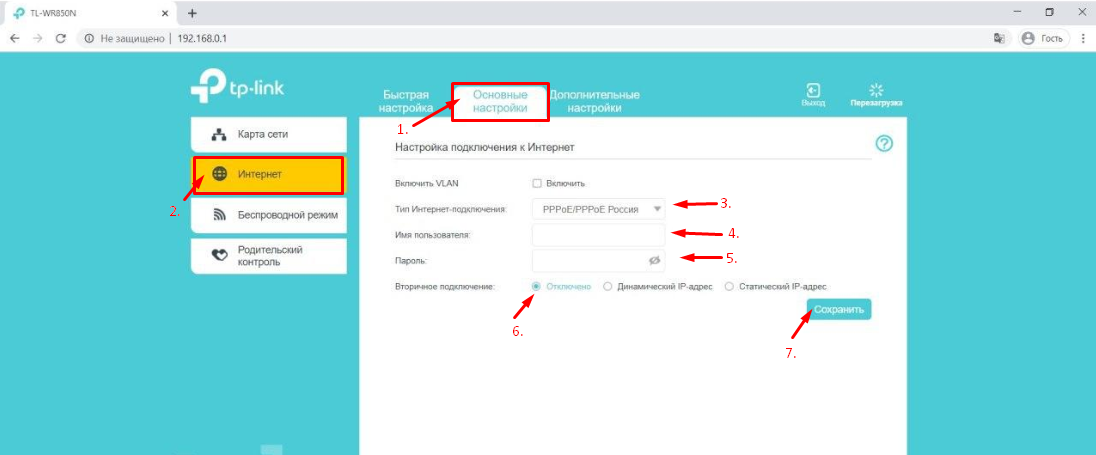
4. Now you are in the router settings. In the top row, select the "Basic Settings" section.
5. After that, select "Internet" in the menu on the left.
6. In the "Internet connection type" section, select the "PPPoE/PPPoE Russia" section in the drop-down menu.
7. In the fields "Username" and "Password" that appear, you need to enter your login and password from your personal account. After that, click the "Save" button.
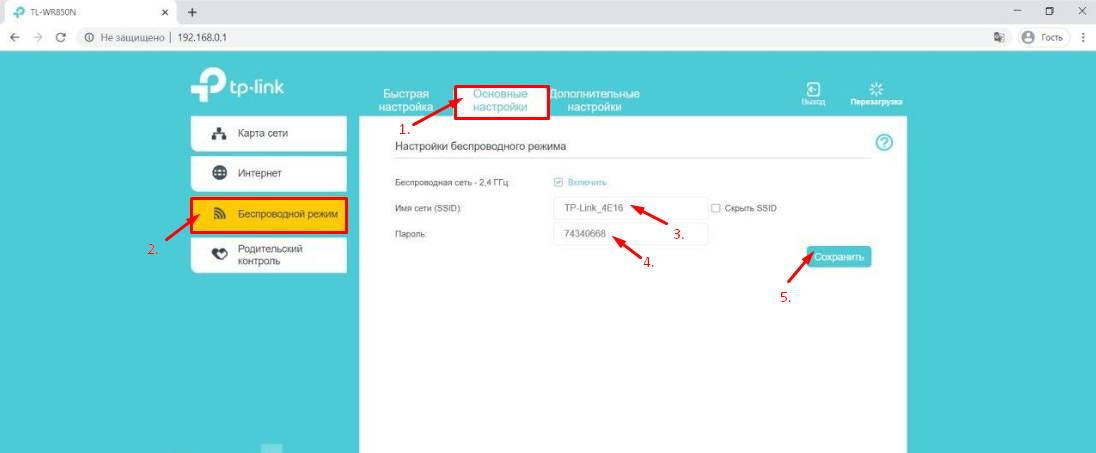
8. The next and last step is setting up the Wi-Fi. Select "Wireless" section from the menu on the left.
9. In the "Network name (SSID)" field, enter the name of your wireless network (you can choose any name). In the "Password" field, you need to enter the password you want, it will be used to connect to the Wi-Fi network (at least 8 signs are required). Click the "Save" button.
10. Remote access setup.
Remote access setup may be needed in different situations. Our technical support specialists ask users to set up remote access to perform a complete diagnostic, as well as to be able to remotely change router settings, manage connected devices, reboot the router, etc.
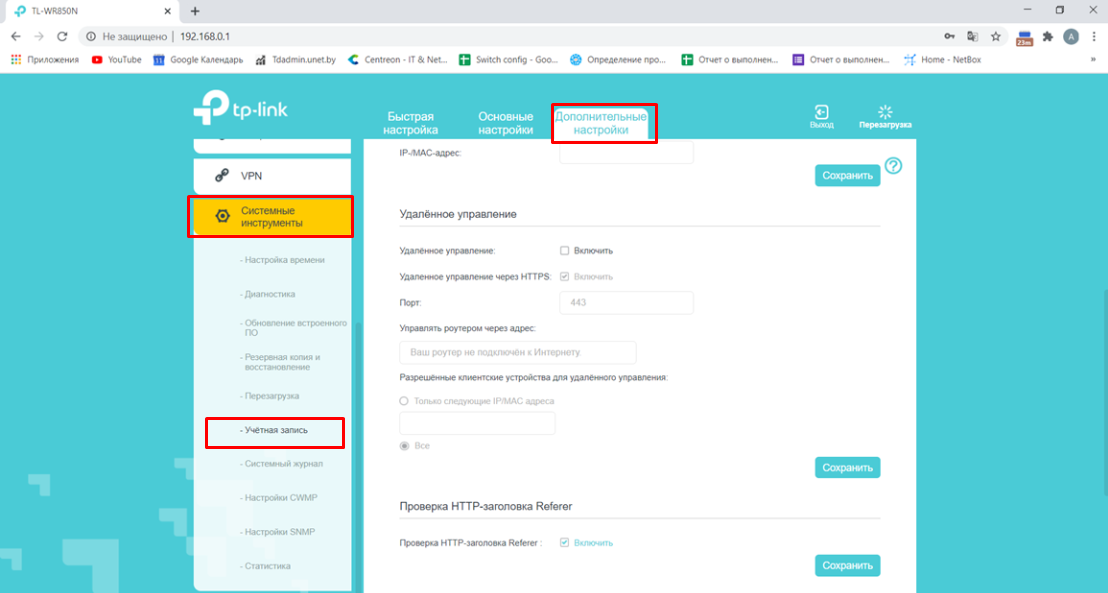
Go to the menu "Advanced Settings" - "System Tools" - "Account".
In the window that opens, find the section "Remote management"
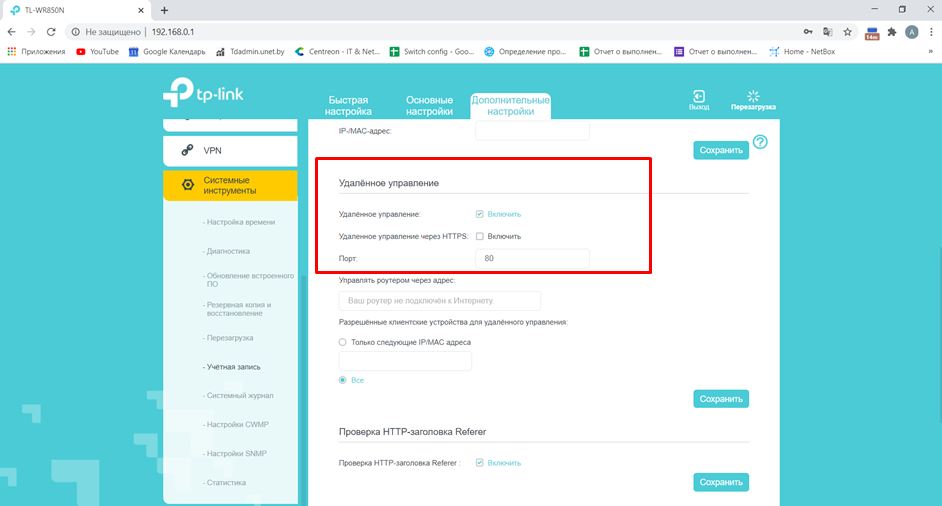
Put the mark next to "Remote control: activate" and put away the mark "Remote control via HTTPS: activate"
It should turn out like this:
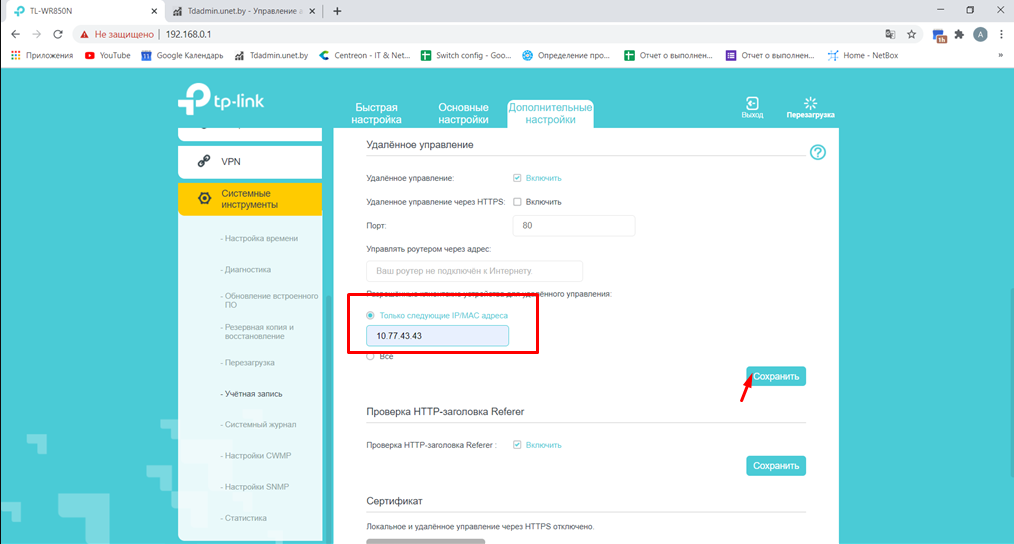
Next, check the section “Only the following IP / MAC addresses” and enter 10.77.43.43 in the field below, click the “Save” button.
That's it! Setup is completed! Enjoy using our internet! :)
Subscribe to the mobile application: Viber, Telegram.
And also follow the latest news in our Telegram channel.
If you have any questions - write to us or call 777 82 82 (any mobile operator).